When we started DIY painting kitchen cabinets in our 1994 Salt Lake City kitchen, I assumed the hard part would be brushing on the paint. That assumption lasted until I removed the first drawer front and found three decades of grease, mystery caulk, and one petrified cereal crumb. The project worked, but it was not a quick Saturday makeover. It was a two-weekend renovation with a spreadsheet, a temporary dish station, and several moments when I seriously considered ordering new doors.
The good news is that this project can save real money. Our 180-square-foot kitchen had 24 doors and 11 drawer fronts. A professional quote for refinishing landed around $4,800, while our materials cost $612.84. We supplied the labor, the sore shoulders, and the garage space. If you can tolerate the disruption and follow the prep process, DIY painting kitchen cabinets is one of the better mid-budget upgrades available to homeowners.
Start with the cabinet condition, not the paint color
Before buying a gallon of sage green, inspect the boxes, doors, hinges, and drawer slides. Paint can change the appearance of solid wood, MDF, and laminate, but it cannot repair swollen particleboard, loose joints, or doors that no longer sit square. Our cabinet boxes were structurally fine, but two lower doors had water damage near the sink. We replaced those before painting rather than trying to hide the problem.
The finish matters too. Cabinets coated in glossy polyurethane, conversion varnish, or thick oil paint need more cleaning and sanding than lightly finished wood. Laminate requires a bonding primer specifically rated for slick surfaces. If the existing finish is peeling, scrape loose areas and feather the edges until they feel smooth under your fingertips.
I made a test door before committing to the whole kitchen. It cost less than $30 in primer and paint, and it exposed two problems: our first color looked yellow beside the counters, and the cheap foam roller left a texture I could see from across the room. That sample door saved us from repeating the entire job.
The materials budget is bigger than a paint can
Our $612.84 total included a degreaser, 220- and 320-grit sanding sponges, tack cloths, caulk, wood filler, primer, cabinet enamel, disposable gloves, drop cloths, painter's tape, a small spray shelter, and replacement hardware. The paint itself was about $150, not the whole budget.
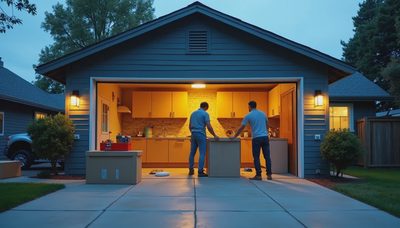
For DIY painting kitchen cabinets, the most important purchase was not the premium brush. It was a set of 30 plastic door stands that kept wet doors off the garage floor. We also used a six-inch microfiber roller for broad panels and a quality angled brush for profiles and corners. A random-orbit sander helped with large flat areas, but I used hand sanding near edges to avoid rounding them over.
We chose a waterborne alkyd cabinet enamel from a local paint store. Products from Benjamin Moore, Sherwin-Williams, and Behr each have cabinet-oriented options, but the label matters more than the logo. Look for a hard-drying trim or cabinet coating, follow the recoat window, and do not assume dry means cured. Our doors felt dry after several hours but needed roughly a week before they tolerated normal family abuse.
Prep is the actual project
The first day was almost entirely removal and cleaning. I labeled every door and hinge location with painter's tape and a marker, then photographed the hinge setup before taking anything apart. That five-minute photo session prevented a surprisingly annoying cabinet-door puzzle later.
We washed every surface twice with a degreaser, using fresh water for the final wipe. Kitchen grime can prevent primer from bonding, especially around the range hood and drawer pulls. After cleaning, I filled old screw holes and dents, let the filler dry, and sanded until each repair disappeared when viewed at a low angle.
The best DIY painting kitchen cabinets results come from boring preparation. Scuff sanding is not about removing every bit of old finish. It creates a consistent surface for primer. I used 220 grit on most areas, vacuumed the dust, and wiped everything with a clean damp cloth. Do not paint over dust; it becomes permanent texture.
We removed the cabinet doors and painted the boxes in place. That meant masking the countertops, walls, appliances, and floor carefully. Painting the boxes took longer than expected because of tight corners, but removing them would have created a much larger reinstallation problem.
A realistic weekend-by-weekend timeline
Weekend one was labeling, removal, cleaning, filling, sanding, and setting up the garage. The doors occupied two folding tables and a temporary shelf system. We used the kitchen carefully during this stage, but the sink and refrigerator stayed connected.
On weekend two, I primed the backs of the doors in the morning and the fronts later that day. Primer exposed several missed repairs, so I waited, fixed them, and applied a second coat where the old color showed through. Rushing at this point would have created visible blotches under the final color.
The following week included two finish coats on the doors and two on the cabinet boxes. Each coat took about three hours of active work, followed by drying time. I painted after the kids went to bed, which sounds efficient until you realize a tired person holding a brush near a freshly painted panel is a quality-control risk.
For DIY painting kitchen cabinets, schedule at least seven days of limited kitchen access and two full weekends of labor. A faster timeline is possible with spraying equipment and a dedicated workspace, but that adds setup, masking, ventilation, and cleanup. Our slower approach was less elegant and easier to recover from.
Mistakes that cost us time and money
My first mistake was applying too much paint to the center panels. It looked fine wet and developed small curtains as it leveled. I sanded those areas after they cured and recoated them. Thin coats beat heroic coats every time.
My second mistake was reinstalling one door too soon. The edge looked dry, but the hinge compressed the soft coating and left a small mark. We removed it, waited several more days, and touched it up. Cabinet enamel needs curing time, particularly in a cool garage.
My third mistake was assuming the old hinges were all identical. They looked similar but had slightly different overlays. Sorting them into labeled bags was easy after the fact; mixing them together was not. The spreadsheet now has a column for hardware location, because apparently this is who I am.
Another lesson from DIY painting kitchen cabinets is that hardware can change the perceived quality of the result. We spent $184 on simple brushed-nickel pulls and knobs. That was not the cheapest option, but new hardware covered old wear and made the painted doors feel intentional rather than merely refreshed.
Was the savings worth the disruption?
For our family, yes. We spent about $613 instead of a quoted $4,800 refinishing price, although the comparison is not perfectly equal because a professional would have delivered a faster, more controlled finish. Our result has a few imperfections: one inside corner is not quite smooth, and a drawer front shows a faint brush mark if the light hits it sideways. Nobody notices during breakfast, including me most days.
The larger cost was household disruption. For more than a week, dishes lived in plastic bins in the dining room. We cooked with the microwave, toaster oven, and outdoor grill. Megan handled lunches while I handled the paint schedule, and the kids treated the garage door stands like an obstacle course until I moved them out of reach.
If you are researching DIY painting kitchen cabinets, make a small test, price every consumable, and protect more time than your optimistic estimate suggests. Clean thoroughly, label everything, use a real cabinet coating, and let the finish cure before normal use. Measure twice, cook once. In our case, the almond cabinets became a warmer blue-gray kitchen for a manageable cash outlay and a memorable amount of garage clutter.