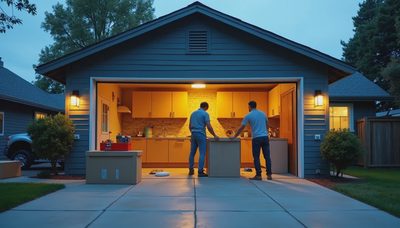
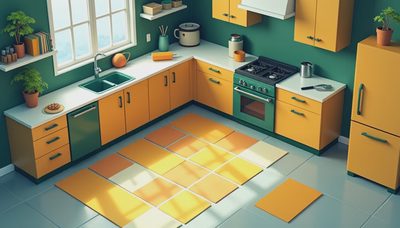
The almond-colored kitchen in our 1994 Salt Lake City house looked tired, but the cabinet boxes were straight, square, and still firmly attached to the wall. That made kitchen cabinet doors the logical starting point instead of tearing out everything and ordering a new kitchen. I measured, compared materials, ignored several overly optimistic YouTube tutorials, and tracked every receipt. The result was not a magazine-perfect process. It was a useful one, and the final bill came in far below a full cabinet replacement.
Why we replaced the doors instead of the cabinets
Our original cabinet boxes had some cosmetic damage, especially around the sink, but they were made from solid particleboard and plywood components that had survived three decades. The layout also worked. The refrigerator, range, and sink were already positioned in a practical triangle, and changing that would have meant moving plumbing and electrical lines. A layout change could easily add several thousand dollars before buying a single drawer.
Replacing kitchen cabinet doors let us change the color and style without paying for new boxes. We kept the existing cabinet frames, removed the old hinges, filled a few screw holes, and installed new slab-style fronts. The doors cost about $1,850, while a comparable semi-custom cabinet package was coming in around $8,000 before installation and countertops. That difference paid for our new sink, faucet, lighting, and a substantial portion of the backsplash.
There were limits. One cabinet box was warped enough that we replaced it, and the interior shelves still looked like a 1990s kitchen. This was not a magic reset button. It was a targeted upgrade that made sense because the underlying structure was usable.

What our kitchen cabinet doors actually cost
Here was our working budget for 18 doors and 11 drawer fronts:
- Door and drawer-front order: $1,850
- Soft-close hinges: $286
- New drawer slides for six drawers: $174
- Cabinet pulls and knobs: $138
- Primer, paint, and sanding supplies: $212
- Shims, screws, wood filler, and spare parts: $96
- Delivery: $120
The total was $2,876 before tax. A professional installer quoted $1,400 for hanging the doors and adjusting the drawers, so I decided to do that part myself. I saved the labor, but I also spent two full weekends working through a very unglamorous sequence of measuring, drilling, adjusting, and re-adjusting.
Prices vary by material and supplier. MDF doors with a factory finish can be affordable and smooth, while hardwood doors often cost more but offer a different grain and feel. Stock sizes are cheaper than custom dimensions, but only if your existing openings match those sizes. A $40 discount per door disappears quickly when every opening needs a custom order.
My spreadsheet had a line for shipping because I had learned that lesson from ordering trim online. Oversized cabinet parts can arrive with surprisingly expensive freight charges. Put delivery, replacement parts, and tax in the first version of your budget rather than treating them as annoying surprises later.
Measuring without creating an expensive pile of firewood
The most important measurement was the existing door itself, not my visual guess about the opening. I removed each door, labeled it with painter's tape, and recorded height, width, thickness, hinge location, and whether it was an overlay or inset style. I also measured the cabinet opening in three places because old boxes are not always perfectly square.
For overlay doors, the amount of coverage around the opening matters. Our new doors covered the frame by roughly half an inch on most sides, but the corner cabinet needed a different approach because two doors met at an angle. I drew the cabinet run on graph paper and marked hinge-side clearances before placing the order.
This is where kitchen cabinet doors punish casual measuring. A door that is one-eighth of an inch too wide can collide with its neighbor. A door that is too short exposes the old frame and makes the whole project look accidental. I ordered one sample door first. It cost extra shipping, but it allowed us to test the color, thickness, hinge cup position, and clearance beside the refrigerator.
Measure twice, cook once. In our case, measure three times, then have your spouse look at the spreadsheet.
Choosing material, finish, and hardware
We considered painted hardwood, thermofoil, and MDF. Painted hardwood sounded durable, but the quoted price pushed the project beyond our target. Thermofoil was easy to clean, but we worried about heat near the range and the difficulty of repairing a damaged surface. We chose factory-finished MDF with a simple warm white color and flat fronts.
The flat style was not just a design preference. It reduced the number of grooves that could collect dust and avoided trying to match a raised-panel profile from the 1990s. The finish had a consistent color across all pieces, something I would have struggled to achieve with a garage paint job.
For hardware, I used 5-inch bar pulls on the main doors and smaller matching pulls on the drawers. We bought one sample of each before ordering the full set. The first bar pull looked too bulky on the narrow pantry door, so we used a smaller version there. That tiny decision improved the daily feel of the kitchen more than I expected.

The installation mistakes I would avoid now
My first mistake was removing every door at once. I had carefully labeled the doors, but I underestimated how much visual information disappears when the kitchen is stripped. For the next phase, I worked one cabinet section at a time and kept a reference door installed nearby.
My second mistake was tightening the hinge screws immediately. Cabinet boxes move slightly, and the hinges need room for final adjustment. I hung the doors loosely, checked the gaps, then adjusted the vertical, horizontal, and depth screws in small increments. The manufacturer instructions were not exciting reading, but they saved me from a crooked row of doors.
My third mistake involved the drawers. The new drawer fronts looked centered on paper, but the old slides had a little side-to-side play. I installed the fronts, opened each drawer, and found three that were visibly off. We removed them, marked the centerline again, and used temporary spacers while fastening them. That added an evening to the schedule and prevented a constant visual irritation.
Plan for dust, hardware packaging, and at least one missing screw. We kept a folding table in the dining room as a temporary assembly station, which made the house feel like a small factory for about ten days.
Are new kitchen cabinet doors worth it?
For us, yes, because the cabinet boxes were sound and the layout already worked. The project delivered the biggest visual change per dollar in our renovation. The new fronts made the room brighter, and the soft-close hinges made the old cabinets feel substantially less old. We also avoided demolition, landfill trips, and several weeks without a functioning kitchen.
I would not recommend this route if your boxes are swollen from water, badly out of square, infested, or arranged in a layout you already dislike. New kitchen cabinet doors cannot fix shallow cabinets, inconvenient corners, or a sink that was installed in the wrong place. In those cases, new cabinets may provide better value over the life of the renovation.
Before ordering, make a complete door schedule, buy a sample, inspect the cabinet boxes, and price installation honestly. If the math still works, kitchen cabinet doors can be a practical middle ground between living with a dated kitchen and spending $20,000 or more on a complete replacement. Our renovation was messy, slower than planned, and full of tiny corrections, but the receipts proved the approach worked for our house.