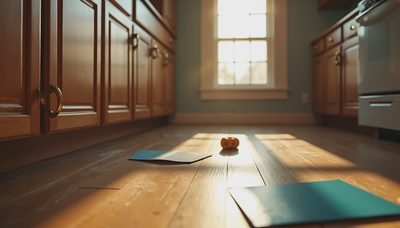
If you are searching for how to paint kitchen cabinets, you probably want the honest version, not a glossy before-and-after photo with the sanding dust cropped out. I painted the almond-colored cabinets in our 1994 Salt Lake City kitchen, and the job saved us thousands of dollars. It also occupied our dining room for nearly three weeks. The finish looked good because I treated the work like a small project launch: document the process, buy the right materials, and do not skip quality control.
Our kitchen has about 180 square feet of cabinet faces and boxes. A local cabinet painter quoted roughly $5,400, while replacing the cabinets would have cost far more. Our DIY total came to $612.84, including primer, paint, sandpaper, rollers, brushes, masking supplies, cabinet hardware, and a rented sprayer. That number does not include my labor, which is the part people conveniently leave out.
What to Buy Before You Remove a Door
The first rule in how to paint kitchen cabinets is to prepare the work area before touching a hinge. You need a degreaser, screwdriver, painter's tape, plastic sheeting, drop cloths, 120- and 220-grit sandpaper, wood filler, a sanding sponge, bonding primer, cabinet-grade paint, a small microfiber roller, and a good angled brush. A random orbital sander is helpful for flat doors, but it is not essential.
I used Krud Kutter for the initial cleaning, Zinsser BIN primer on stubborn areas, and Benjamin Moore Advance in a satin finish. Sherwin-Williams Emerald Urethane is another commonly considered cabinet coating. These products cost more than ordinary wall paint because they are designed to dry harder and resist the daily abuse of fingerprints, cooking grease, and cereal spills.
Make a labeling system before removal. I wrote a number inside each cabinet opening, then put the same number on a piece of painter's tape attached to the corresponding door. I also photographed every hinge position. This took about 45 minutes and saved us from a miserable afternoon of guessing where 24 doors belonged.
Cleaning and Sanding Are the Real Job
Paint does not stick to grease, wax, or years of furniture polish. Our cabinets looked clean, but the first cleaning rag turned yellow within minutes. I wiped every door, drawer front, and exposed cabinet box with degreaser, changed the water repeatedly, and let everything dry overnight. Do not rush this step. Primer over residue creates peeling that often appears weeks after the renovation seems finished.
For how to paint kitchen cabinets successfully, sanding is less about removing every bit of the old finish and more about creating a dull, consistent surface. I scuffed the doors with 120-grit paper, concentrating on glossy edges and damaged spots. Then I filled small dents with wood filler, waited for it to dry, and sanded those repairs smooth. After vacuuming, I wiped the surfaces with a slightly damp lint-free cloth.
I made one avoidable mistake here: I started painting a drawer front before checking it under bright light. The old finish had a shiny strip near the handle, and the primer beaded on that area. I stopped, sanded it again, and added another cleaning pass. That ten-minute correction prevented a much larger repair later.
Primer, Paint, and Application Choices
Primer is not optional on every cabinet, but it is cheap insurance on an older kitchen, especially when the existing surface is laminate, stained wood, or an unknown factory coating. I applied one thin coat of bonding primer, allowed the manufacturer’s stated drying time, then sanded lightly with 220-grit paper. The goal was a smooth surface, not a thick layer that hides detail around panel edges.
The next part of how to paint kitchen cabinets is choosing patience over coverage. I rolled broad flat areas with a six-inch microfiber roller and used a quality angled brush for profiles and corners. Two thin coats of cabinet paint looked better than one heavy coat. Heavy paint pooled at the door edges, and I had to scrape one drawer before it could close properly.
A sprayer can produce the smoothest finish, but it adds setup, masking, thinning, and cleanup. I rented an HVLP sprayer for $68 and practiced on cardboard first. It worked well on the doors, while rolling was faster for the installed cabinet boxes. If you spray, protect the floor, appliances, walls, and your lungs with the appropriate personal protective equipment. Overspray travels farther than your confidence suggests.

A Timeline That Actually Works
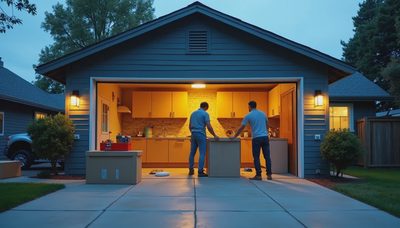
Our first weekend was removal, labeling, cleaning, and light sanding. The second weekend was primer and the first paint coat. The third weekend was the second coat, touch-ups, hardware installation, and reassembly. Between those weekends, doors rested on folding tables in the garage. I used small painter's pyramids so I could coat edges without sticking each door to the work surface.
Dry time matters because paint can feel dry while remaining soft underneath. I waited longer than the minimum instructions before flipping doors. In a busy household, this is the hardest part. Megan needed the kitchen functional for school mornings, and the kids wanted snacks without navigating a maze of stacked cabinet fronts. We left the lower doors off for several days and kept frequently used dishes in plastic bins.
For how to paint kitchen cabinets without losing track of progress, I created four spreadsheet columns: cabinet number, current step, defects, and next action. That sounds excessive until you have 24 doors, 11 drawer fronts, and a growing collection of tiny paint drips.
The Costs, Mistakes, and Finish Quality
Our paint and primer cost about $190. Sandpaper, filler, brushes, rollers, and cleaning supplies added $124. The sprayer rental, masking materials, replacement hinges, and new brushed-nickel pulls brought the total to $612.84. The hardware was not strictly required, but the old brass pulls made the freshly painted doors look unfinished. Replacing them changed the kitchen more than I expected.
The biggest mistake was painting one door in direct afternoon sunlight. The surface flashed dry too quickly and showed lap marks. I sanded it back, repainted it in the shade, and kept the garage door mostly closed afterward. Another mistake was reinstalling two doors before the paint had hardened enough. The hinges left small marks, so I removed them again and waited.
The final finish is not identical to factory-sprayed cabinetry. Up close, you can find a faint roller texture on a few boxes and a brush mark inside one corner. From normal standing distance, the cabinets look clean, durable, and dramatically less dated. After several months of family use, the coating has held up well around the sink and trash pullout.
What I Would Do Differently Next Time
If someone asks me how to paint kitchen cabinets, I would tell them to build a test door first. Use an old door or the least visible one, and test the entire system: cleaner, sanding method, primer, paint, color, and application tool. A sample card from the store cannot show how your existing finish reacts to primer or how a color looks beside your countertop.
I would also remove the cabinet boxes from the wall only if they were being replaced. Painting installed boxes was slower around corners, but demolition would have created more risk, dust, and storage problems. Labeling saved more time than any expensive tool. Better lighting would have helped too; a $25 work light exposed flaws while they were still fixable.
The short version of how to paint kitchen cabinets is simple: clean aggressively, sand enough, prime thoughtfully, apply thin coats, respect drying time, and plan for your household to function around the project. The work is repetitive rather than mysterious. If your cabinets are structurally sound, paint can deliver a meaningful update for a fraction of replacement cost. Measure twice, cook once—and let the paint cure before putting the cereal bowls back.