
When I started researching how to renovate a kitchen cheaply, I expected to find a magic paint color and a list of bargain products. What I actually needed was a sequence. Our 1994 kitchen in Salt Lake City had almond cabinets, yellowed laminate counters, bad lighting, and exactly zero room in the budget for a dramatic gut renovation. Megan and I set a working limit of $12,000, then built a plan around the parts we could improve without moving walls, plumbing, or gas lines.
The result was not an Instagram showroom. It was a cleaner, brighter kitchen that worked better for our family of four. We spent about $10,860 over several months, including tools, sales tax, and a few mistakes. The biggest savings came from leaving the layout alone and spending money only where our hands and eyes noticed the difference.
Start with the expensive decisions
The first rule for how to renovate a kitchen cheaply is simple: do not change the footprint unless the existing layout is genuinely unsafe or unusable. Moving a sink can involve plumbing, flooring, cabinets, drywall, and electrical work. A wall removal can turn a manageable project into a contractor-led remodel very quickly.
Our sink, range, refrigerator, and dishwasher were in sensible locations, so they stayed. That decision saved us several thousand dollars before we bought anything. Instead, I measured every wall, cabinet opening, appliance, and walkway. I drew the room in a basic spreadsheet and marked clearance around doors and drawers. Measure twice, cook once became less of a slogan and more of a survival strategy.
Before shopping, make three lists. The first is urgent work, such as a leaking supply line, damaged subfloor, or unsafe outlet. The second is high-impact work, such as cabinets, counters, and lighting. The third is cosmetic work, including hardware, paint, and decor. Fund the lists in that order. A new pendant light cannot compensate for a cabinet that is collapsing under the sink.
Spend where the room looks and feels different
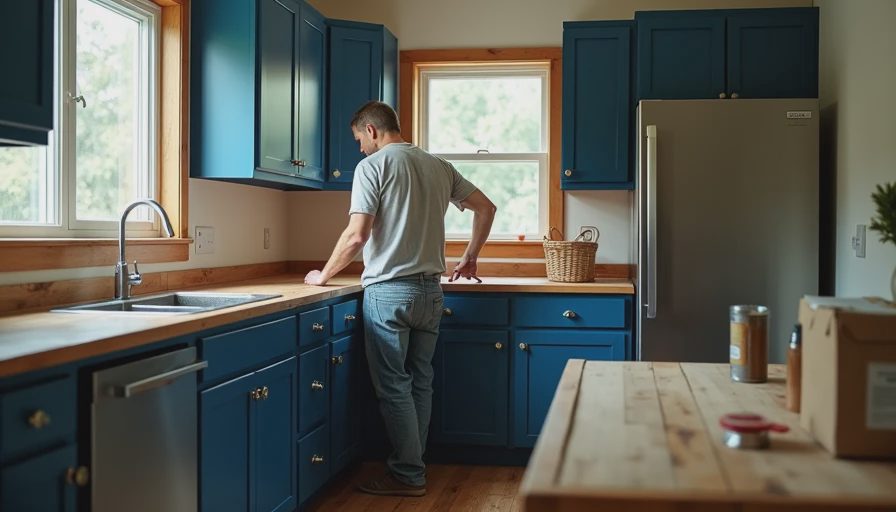
Cabinet replacement was our largest temptation. New stock cabinets would have cost roughly $7,000 to $12,000 before installation, so we kept the existing oak boxes. Several doors were still square, the frames were solid, and the drawers operated reasonably well. We cleaned everything with a degreaser, lightly sanded the surfaces, filled old hardware holes, and painted the doors using a cabinet-rated enamel.
The cabinet project cost $620 for primer, paint, rollers, sanding supplies, replacement hinges, and new pulls. It also took three weekends. My first finish looked uneven because I rushed the second coat. I sanded the worst doors and repainted them instead of pretending the problem would disappear after reassembly. It did not.
Counters were where we spent more confidently. The old laminate was swollen near the dishwasher, so paint was not a responsible fix. We chose a standard laminate countertop from a local home improvement store for about $1,450, including the sink cutout and delivery. Quartz would have looked excellent, but the additional several thousand dollars would not have improved how our kids eat cereal before school.
For how to renovate a kitchen cheaply, this is a useful contrast: preserve solid cabinet boxes, but replace a failing work surface. Saving money does not mean treating every component the same. It means separating structural problems from dated appearances.
Use DIY labor selectively
I am comfortable with a drill, a sander, and a spreadsheet. I am not comfortable pretending to be an electrician. We handled demolition, cabinet painting, trim, shelving, caulking, and hardware installation ourselves. We hired a licensed professional for an electrical update and paid a plumber to replace two questionable shutoff valves under the sink.
That mixed approach kept the labor bill near $2,100 instead of making the entire project contractor-priced. The electrician added two countertop outlets, corrected an overloaded circuit, and installed brighter ceiling fixtures. The plumber finished his portion in one visit. Those were not the places to learn by watching a ten-minute video.
DIY savings are real, but only when the work is planned. Add the value of your time, rental equipment, disposal fees, and the cost of redoing mistakes. I spent $180 on a trim router that I used twice, then discovered that a borrowed oscillating tool would have handled most of the same work. Buying a tool is not automatically saving money.
Choose upgrades that reduce daily friction
A cheap renovation should still solve daily annoyances. Our original lighting left dark patches across the counters, so we installed under-cabinet LED strips for about $145. The change was more noticeable than decorative backsplash tile. We also added a pull-out trash bin, a narrow sheet-pan divider, and two adjustable shelves inside awkward corner cabinets.
These small storage changes cost about $310 and made the room feel larger without adding square footage. We skipped open shelving because dust, grease, and children do not form a peaceful partnership. We also kept one ordinary cabinet door where social media advice suggested glass. Megan wanted the hidden storage, and Megan was correct.
When comparing options, ask what you touch every day. A $35 drawer organizer can be more valuable than a $600 design feature. A $90 faucet with a useful spray pattern can matter more than premium knobs. For how to renovate a kitchen cheaply, prioritize the actions repeated at breakfast, dinner, cleanup, and grocery unloading.

Control the budget with phases
We divided the work into four phases: repair, prep, appearance, and finishing. Repairs came first and cost $1,180. Prep included sanding, patching, priming, and basic tools. Appearance covered paint, counters, backsplash, and lighting. Finishing included hardware, organizers, caulk, and touch-up supplies.
Keeping phases separate prevented us from buying attractive items before solving hidden problems. We also kept a 15 percent contingency, although our contingency was nearly consumed by a damaged dishwasher valve and extra cabinet paint. Every receipt went into the Google Sheet with the date, category, store, and reason for purchase. That made it harder to call a $240 impulse faucet a necessary expense.
The backsplash is a good example. We used a simple white ceramic tile and installed it ourselves behind the range and sink, spending about $480 for tile, adhesive, grout, trim, and tools. Limiting the backsplash area saved material and reduced cutting. A full-height slab would have been beautiful, but beautiful was not the requirement.
What I would change next time
If I repeated the project, I would order cabinet hardware after confirming the final paint color, not before. The first brushed nickel pulls looked cold against the finished cabinets, and returning them cost a shipping fee. I would also rent a better sander for one weekend instead of stretching a small palm sander across dozens of doors.
I would not change the decision to keep the layout. The kitchen became brighter, easier to clean, and more useful without taking out a wall. That is the most honest answer to how to renovate a kitchen cheaply: protect the expensive infrastructure, repair what is failing, and spend your limited dollars on repeated daily improvements.
Our final room still has an older floor and one cabinet with a slightly crooked door. I can live with both. The project finished under budget, our family could keep cooking through most of it, and the spreadsheet tells us exactly what we bought. Start with measurements, set a hard ceiling, choose the work you can do well, and hire help where safety matters. Then make the room yours one receipt at a time.