
When people search for inexpensive kitchen renovations, they usually want the same thing I wanted: a kitchen that feels clean, functional, and current without borrowing against the future. Our 1994 suburban kitchen in Salt Lake City had almond cabinets, yellowed laminate counters, and one fluorescent light that made every meal look like evidence. It was not a disaster, but it was tired.
Megan and I set a working budget of $18,000 and quickly learned that the budget was less about finding one miracle bargain and more about making dozens of unglamorous decisions. We kept the existing layout, tracked every receipt in a spreadsheet, and did some work ourselves. The final total landed at $16,842 before the value of my time. Here is what worked, what hurt, and where inexpensive kitchen renovations can go off the rails.
Start with the layout, not the finishes
The most powerful cost-saving decision was leaving the sink, range, dishwasher, and refrigerator in their existing locations. Moving plumbing and electrical circuits would have added several thousand dollars before we had chosen a single cabinet pull. The kitchen already had a workable triangle; it simply looked dated and lacked storage where we needed it.
I spent a Saturday measuring every wall, appliance opening, window, and door swing. Then I drew the room on graph paper and made Megan walk through our normal routine. We discovered that the trash can blocked the dishwasher and that a shallow cabinet near the refrigerator was mostly wasted space. Those discoveries cost nothing and prevented expensive ordering mistakes.
For our inexpensive kitchen renovations plan, we replaced two awkward cabinets with wider stock units but kept the overall footprint. That gave us a better trash and recycling zone without requiring a new floor plan. Measure twice, cook once. I wrote that on the front page of the renovation notebook because I ignored it exactly once and had to return a cabinet door.

Where our money actually went
Our largest expense was cabinetry at $6,380, including stock boxes, unfinished end panels, trim, and delivery. We did not buy custom cabinets. We chose a mid-range painted shaker line from a local supplier, assembled some boxes ourselves, and paid an installer for the sections that had to be perfectly level. The installer cost $2,450, which felt steep until I watched him correct a wall that was nearly three-quarters of an inch out of square.
The quartz countertop cost $2,740 installed. This was not the cheapest surface, but we selected a standard white pattern and avoided waterfall edges, complex seams, and a larger island. Laminate would have saved roughly $1,000, and I still think it is a smart choice for many inexpensive kitchen renovations. We chose quartz because the quote was reasonable and the maintenance fit our family better.
Appliances totaled $3,180. We kept our relatively new refrigerator, bought a basic stainless dishwasher during a holiday sale, and selected a 30-inch electric range with simple controls. The remaining costs included $620 for a tile backsplash, $410 for lighting, $275 for hardware, $680 for paint and supplies, and approximately $107 for small items that somehow multiplied every weekend.
Spend on function and save on decoration
The best inexpensive kitchen renovations separate daily-use improvements from visual extras. We spent on full-extension drawer slides, a quieter dishwasher, brighter ceiling fixtures, and a deeper single-bowl sink. Those are things we touch or use almost every day. We saved on open shelving, decorative legs, premium cabinet inserts, and imported tile.
Our backsplash is a basic 3-by-12-inch white ceramic tile. It cost less than many trendy mosaics, installed quickly, and does not compete with the cabinet color. I paid a tile setter for the countertop-to-cabinet section because my first attempt had grout lines drifting like a bad software release. The $620 invoice was cheaper than buying replacement tile and pretending the crooked lines were intentional.
Lighting made a surprisingly large difference. The old fluorescent fixture came out, and we installed four dimmable LED recessed lights plus a small pendant over the prep area. The room immediately felt less gloomy. If your budget is tight, I would prioritize lighting before decorative cabinet glass or a statement hood.
The jobs I would not repeat
Painting the cabinets was our first plan and our first failed experiment. I spent two weekends degreasing, sanding, priming, and spraying the old doors in the garage. The finish looked decent from six feet away, but the doors showed every nick and the hinges were worn. We eventually ordered new doors and drawer fronts, losing about $390 in paint, primer, and supplies.
That failure taught me that inexpensive kitchen renovations still need a realistic labor plan. DIY is not automatically free. My unpaid weekends had a value, and the family paid for them with takeout, disrupted routines, and a garage full of doors. I would still do the demolition, painting, hardware installation, and basic trim again. I would not spray another full cabinet set without a proper workshop.
We also underestimated electrical work. Adding a dedicated circuit for the microwave and replacing two old outlets cost $860 after an electrician inspected the existing wiring. It was not a fun line item, but it was the correct place to spend money. Cosmetic savings are not worth ignoring safety or code requirements.
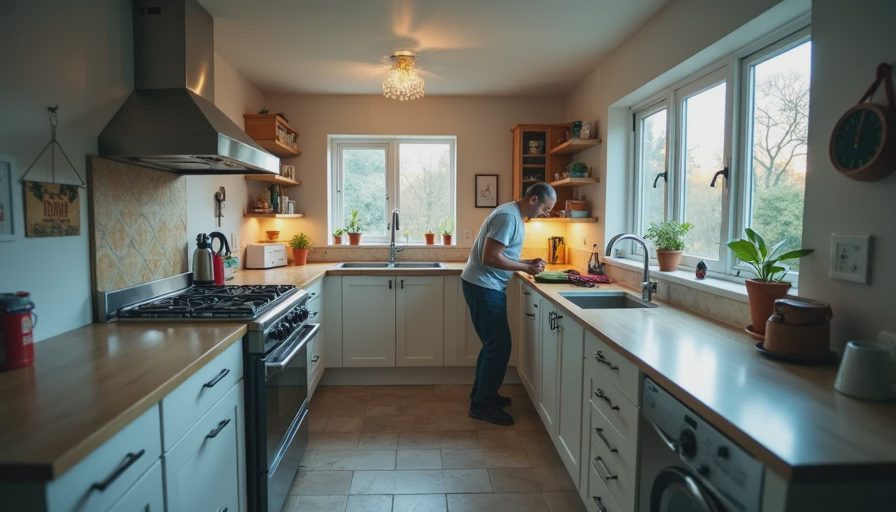
A practical budget for inexpensive kitchen renovations
A modest kitchen refresh can take several shapes. A $3,000 to $6,000 update might include paint, lighting, hardware, a new faucet, and a laminate countertop while keeping the cabinets. A $7,000 to $12,000 project could add stock cabinet fronts, a backsplash, and one replacement appliance. Our $16,842 project included more cabinetry, quartz, electrical updates, and professional installation.
The useful exercise is to create three columns: must have, helpful, and someday. Our must-have list included safer outlets, better lighting, functional drawers, and a surface that could handle family breakfasts. The helpful list included a pull-out trash cabinet and a quieter dishwasher. Someday items included a pot filler, a wine refrigerator, and a fancy range hood. They remain someday items because the food tastes the same.
Get written quotes for installation, demolition, countertop fabrication, plumbing, and electrical work. Ask whether delivery, sink cutouts, disposal fees, and sales tax are included. We held back $1,500 as a contingency and used $940 of it. Old houses hide surprises behind walls, and a budget without a reserve is just a wish written in a spreadsheet.
What I would recommend now
For most homeowners, the best inexpensive kitchen renovations preserve the layout, improve lighting, update the cabinet fronts, and put money into the surfaces that take daily abuse. Buy standard sizes when possible. Compare cabinet suppliers in person. Bring your appliance dimensions to every conversation. Do not order countertops until the cabinets are installed and verified.
I would also stage the work. Complete design and purchasing first, then demolition, rough electrical and plumbing, cabinets, counters, backsplash, paint, and hardware. We lost nearly a week because a faucet arrived late, so the sink could not be connected and the kitchen became a temporary storage room. A clear sequence does not eliminate chaos, but it makes chaos easier to fix.
The finished kitchen is not magazine-perfect. One cabinet has a tiny paint flaw, the floor still has a dent near the refrigerator, and I can point out three places where my trim work is merely acceptable. But it is brighter, easier to cook in, and much less frustrating. That is the honest promise of inexpensive kitchen renovations: not a luxury showroom, but a room that works better every day without wrecking your finances.