Our kitchen pantry cabinet decision started with a cereal avalanche. One box slid from the top shelf, hit a mixing bowl, and scattered dry oats across the floor while I was already late for work. That was the moment I stopped pretending our 1994 kitchen storage was “quirky.” We needed a kitchen pantry cabinet that used vertical space, fit our actual wall, and did not consume the money reserved for countertops.
This was not a magazine kitchen with a hidden appliance garage and a pantry large enough to host Thanksgiving. Our test zone is about 180 square feet, and every inch has a job. Megan wanted doors that closed cleanly. I wanted adjustable shelves. The kids wanted snacks they could reach without climbing onto a chair. I wanted the final receipt to stay below $1,000. Measure twice, cook once became less of a slogan and more of a safety protocol.
The Wall We Had to Work With
The available wall measured 31 inches wide, 24 inches deep, and just under 90 inches high after we accounted for the baseboard and crown molding. That measurement immediately ruled out several attractive options. A standard 36-inch pantry would not fit, and a 12-inch-deep unit would waste the wall behind it. The nearby refrigerator door also needed clearance, so a deep cabinet with a thick handle could create a daily collision.
I made a cardboard mockup from an old moving box. It looked ridiculous, but it exposed a problem that the online product photos did not: a 24-inch-deep cabinet would make the walkway feel tight. We settled on roughly 18 inches of depth and planned to store cans, cereal, baking supplies, and small appliances there. Large stockpots would stay in a lower cabinet.
Our original kitchen pantry cabinet sketch also included pull-out shelves everywhere. Then I priced them. Full-extension hardware can add $80 to $150 per shelf, and the total climbed quickly. We kept one pull-out tray at the bottom for heavy items and used fixed adjustable shelves above it. That compromise saved approximately $300 without making the cabinet frustrating to use.

Comparing Stock, Semi-Custom, and DIY Options
A ready-to-assemble kitchen pantry cabinet was the cheapest path. Big-box options from brands such as Hampton Bay and IKEA-style modular systems often land between $250 and $700, depending on height, finish, and interior hardware. The tradeoff is that the exact width may not match your opening, and filler strips can make a simple installation look improvised.
Semi-custom cabinetry offered better sizing and more finish choices. The quotes we received ranged from about $900 to $1,500 before installation. That was more than we wanted for one storage unit, although the construction felt sturdier and the door styles matched our planned base cabinets.
Building from plywood was tempting because I already owned a circular saw and a pocket-hole jig. My spreadsheet was less enthusiastic. Cabinet-grade plywood, edge banding, paint, hinges, drawer slides, and a full weekend of labor put the DIY estimate near $650. That did not include the cost of fixing a crooked box. We bought a stock cabinet for $468, added a $92 pull-out tray, and spent another $64 on trim and filler material. Our pre-tax total was $624.
What We Measured Before Ordering
I measured the opening at the floor, middle, and ceiling because old walls are rarely as straight as the blueprint suggests. The narrowest width was 30 5/8 inches, not the 31 inches I first wrote in my notebook. That difference mattered. We ordered a 30-inch cabinet and left room for two side fillers.
I also measured the door swing, baseboard height, outlet location, and distance from the cabinet face to the opposite counter. If you are placing a kitchen pantry cabinet beside a refrigerator, measure the refrigerator door at its widest open position, not just the closed footprint. We left 39 inches of walking clearance, which has been enough for two people to pass without the usual kitchen shoulder bump.
The ceiling height created another decision. A tall cabinet would have offered useful storage, but lifting a heavy stand mixer overhead is not a smart household sport. We chose a 84-inch unit and used the top area for serving platters we need only a few times a year. A small crown molding strip closed the gap visually.
The Installation Mistake I Nearly Made
I assumed the floor was level because nothing visibly rolled across it. That was not a reliable test. The cabinet leaned enough to make the doors drift open, and the gap at the top looked wider on one side. I removed it, added composite shims, and checked the box with a four-foot level before fastening it to the wall studs.
The cabinet took most of a Saturday, not the two hours shown in the installation video. Finding studs, trimming the baseboard, cutting filler strips, and adjusting the hinges consumed the afternoon. I also drilled one pilot hole too close to the edge of a filler and split it. A replacement strip cost $18 and an hour of paint touch-up.
For safety, we anchored the cabinet to the wall according to the manufacturer’s instructions rather than relying on its weight. This is especially important with tall storage and children in the house. The doors now sit evenly, and the shelves stay put when Charlie pulls down a box of crackers.
How We Organized the Inside
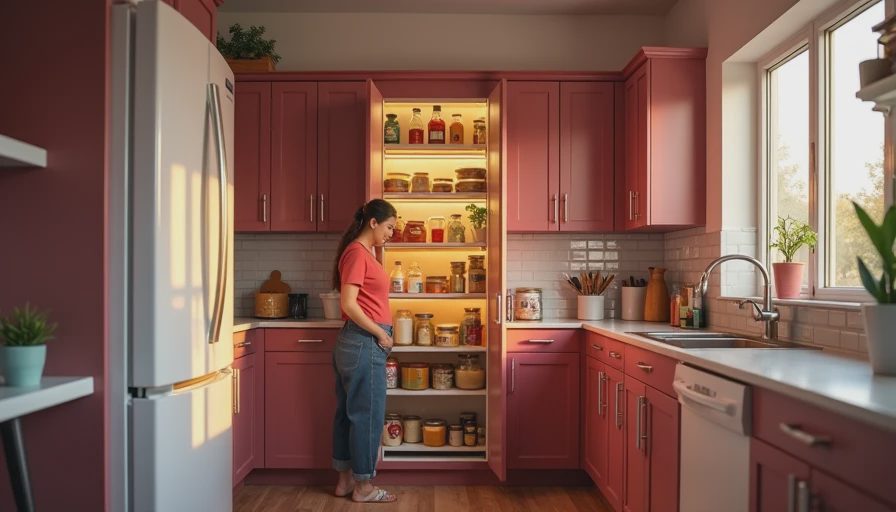
The most expensive interior accessory was not the most useful one. We placed the pull-out tray 10 inches above the floor for flour, rice, and the slow cooker. The middle shelves hold daily items: cereal, pasta, canned tomatoes, and lunch supplies. The upper shelves contain backup ingredients and the serving pieces we do not use weekly.
Shelf spacing took two revisions. At first, I made every opening tall enough for a large cereal box, which created wasted air above smaller cans. We moved two shelves closer together and gained a surprisingly useful row for jars. Clear bins were not necessary for everything, so we used four inexpensive plastic containers for snack bags and loose baking supplies rather than buying a matching set of twelve.
The kitchen pantry cabinet works best because each shelf has a category, not because it looks perfect. When a category outgrows its shelf, that is a purchasing signal. We stopped buying duplicate pasta and pancake mix because the contents are visible at a glance.
What I Would Change Next Time
I would order the cabinet doors and trim at the same time. Our main cabinet arrived first, but the matching filler was delayed, leaving an unfinished side visible for nearly three weeks. I would also choose soft-close hinges if the upgrade were under $50. The standard hinges function, but the kids can make them sound like a locker room door.
I would not pay for interior lighting. We considered rechargeable LED strips, then realized the nearby ceiling light already illuminated the shelves when the door opened. Spending $100 to solve a problem we did not have would have been classic renovation-brain.
If your opening is unusual, get three prices before deciding. Compare a stock kitchen pantry cabinet, a local cabinet shop quote, and a materials-only DIY estimate. Include filler, trim, delivery, hardware, tax, and the value of your weekend. The cheapest sticker price is not always the cheapest finished result.
Our final storage project came in at $706 after tax, paint, shims, and the replacement trim. It was not flawless, but it holds more than the old shelves, looks intentional, and stopped the cereal avalanche. For a mid-budget renovation, that is a successful launch. Measure twice, cook once.