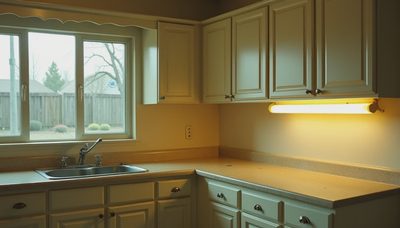
You know the drill: you search for kitchen renovation photos and get a feed of marble waterfalls and custom cabinetry that costs more than our first house. When Megan and I planned our 1994 Salt Lake City kitchen, I promised myself I'd document every step. Not for the 'gram, but because I could not find honest photos anywhere. So here's our real record: a 180-square-foot kitchen, a $32,000 budget, and a Google Sheet that tracks every single receipt.
We gutted the whole room on Memorial Day weekend. By the time the demo dust settled, we had a budget spreadsheet that looked like a small business disaster. But that's what makes these kitchen renovation photos different from the ones on Houzz: we show the mess, the missteps, and the money. No filter, no fancy lighting, no professional staging. Just what a normal suburban family actually had to deal with.
What Nobody Tells You About the "After" Photos
When you look at glossy kitchen renovation photos, you never see the three weeks of open wall cavities, the outlet that tested wrong, or the floor that sloped toward the pantry. Our demo took five weekends. Dave (my contractor buddy) kept saying "measure twice, cook once" — we didn't, and I paid $400 for a cabinet filler piece I cut wrong. The real shots from our job are 40% dust-covered boots and 30% questionable wiring. The rest is me ruining a perfectly good drill bit.
The ceiling had two layers of popcorn texture that tested positive for asbestos. That added $800 to the budget for professional abatement. I didn't plan for that, and no photo from a gallery will ever show you an abatement crew in moon suits. I wish they would.
Where the $32,000 Actually Went
This is the part people really want from kitchen renovation photos. Not the staged reveal, but the honest line items. Here's ours: cabinets cost $12,800 for RTA boxes from a local supplier, which I assembled with Dave over two weekends. Countertops were $5,600 — we used a quartz remnant instead of the full slab we originally priced, and you can't tell the difference unless you look at the seam location. Appliances ran $4,900 for a GE Cafe range and fridge, both open-box from a big-box store. Labor was $3,200 for Dave's crew to handle electrical and drywall. Flooring, a luxury vinyl plank from Home Depot, cost $2,100 and we installed it ourselves. Fixtures and hardware added $1,100, including a Delta faucet and knobs from Rejuvenation. Plumbing was $800 to move the sink drain 14 inches. Permits and disposal ran $500. And mistakes? That's a separate $1,000 line item I won't get back, like the wrong-size base cabinet and a custom trim piece that ended up in the garage rafters.
How to Take Kitchen Renovation Photos That Actually Help You
I'm no photographer, but after 14 weeks I ended up with a set of kitchen renovation photos that told a real story. The trick: stand in the same spot every week, same time of day, and shoot wide. Use natural light, not the work lamp with the yellow plastic cover. Photograph every corner before you cover it up — the junction box, the floor patch, the plumbing stub. I named every file like this: date_room_phase.jpg. It sounds nerdy, but it saved me when I needed to compare a wall before and after the electrician came.

What I Wish I'd Photographed Before We Started
The biggest mistake I made was starting my kitchen renovation photos on demo day. I have no photo of our original cabinets with the doors still on, no shot of the 1994 wire path, and no wide-angle of the soffit before we removed it. You need at least twenty "before" photos taken the week before the hammer comes out. Empty the counters, turn on every light, open every cabinet door. That's the photo set that helps you when you're staring at the final reveal and wondering if you actually changed anything.
Questions to Ask Before You Trust Any Kitchen Renovation Photos
Just because a picture looks beautiful doesn't mean it's useful for your budget. Ask these three things before you pin that image: Was a wall removed? That triples the cost. Are the appliances actually what you'd buy, or are they propping up the styling? What's the square footage? A 300-square-foot kitchen with a 10-foot island is a different beast than our 180-square-foot galley. When you apply those filters, you stop comparing apples to a vintage fruit truck.
I also keep a physical renovation notebook on the counter, and every Monday I print out the best photo from the week and tape it in. That notebook now has 14 entries, one for every week of the project. When the kitchen feels overwhelming, I flip back to week one and see the empty shell. That's the real reason I take kitchen renovation photos: to remind myself that progress is measured one tile at a time.
We're uploading our full set of kitchen renovation photos to the blog, with annotations that show exactly what each step cost. If you're planning a mid-budget kitchen renovation, use our spreadsheet and skip the mistakes I made. Measure twice, cook once — and take more before pictures than you think you need.